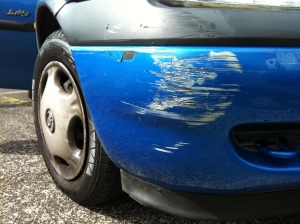
Plastic bumpers can be easily found with the every new car purchase, as most of the new releases from almost every manufacturer come with fiber plastic like material made bumpers. These bumpers are easy to replace, if compared with the traditional metal bumpers.
For more, if for any reason the bumper of the car gets damaged or got some minor scuffs, then you can easily repair it on your own by using Plastic Bumper Repair Kits, easily available in the market nowadays. To make your repairing task a bit easier, here, we are sharing 4 steps to repair the plastic bumpers of your car. Let’s have a look below:-
Give the Damage A Thorough Inspection
Before you start the repairing process, it marks an important step to give the damaged part a thorough inspection so that you could estimate the actual requirement of work done.

Wipe the Surface
After estimating or thorough inspection of the damaged part, now, it’s time to start the repairing process. And, at first wipe the surface, and try to remove all the debris, stickers, and other tears. Use soft piece of cloth to dry the surface.
Apply the Solution Carefully
Now, it’s time to move to the next step of the repairing procedure where you have to be very careful, while heating out the surface and applying the solutions. After applying the solution or chemical mixture, let the surface dry to give it a finishing touch.
Call Off the Repairing Procedure
So, after executing the whole procedure carefully and effectively, now, it’s time to call off the repairs and give the surface an ultimate finishing touch. After, giving the surface a touch up with the top quality paint, your vehicle will get back into good shape.
